
Adding and Managing Users
It is recommended that you make individually-named logins for users that will use features of the portal. Without individual logins, it is not possible to trace actions back to a specific person.
Creating Users
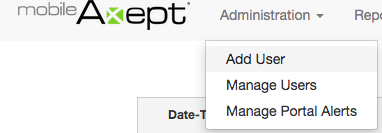
To create a user, select the Administration menu item, and then click Add User in the drop down menu.
Username: User names must be in the form of an email address. A single user can only be associated with account/church/etc.
First Name: User’s first name.
Last Name: User’s last name.
Phone Number: User’s contact phone number.
Email Address: The user’s contact email address of the user in the event that the user’s contact preference is not the same as their username.
Time Zone: The time zone the user is in. All times in the system will be presented as the user’s time zone.
After the users have been created they must be put in to groups. At a minimum, to log in, users must be put in to the ACCOUNT_USER group. To do this, simply access the user management page by clicking the Administration, then Manage Users in the drop down menu.
Managing Users
Users are allowed to take various actions in the portal by virtue of their membership in various groups. Groups can be managed by using the Manage Users function under the Administration menu.
When selected the system will display a list of users. Three possible actions can be taken with each user:
- Change the user’s password.
- Edit the user’s demographics.
- Manipulate the user’s group memberships.

Editing User
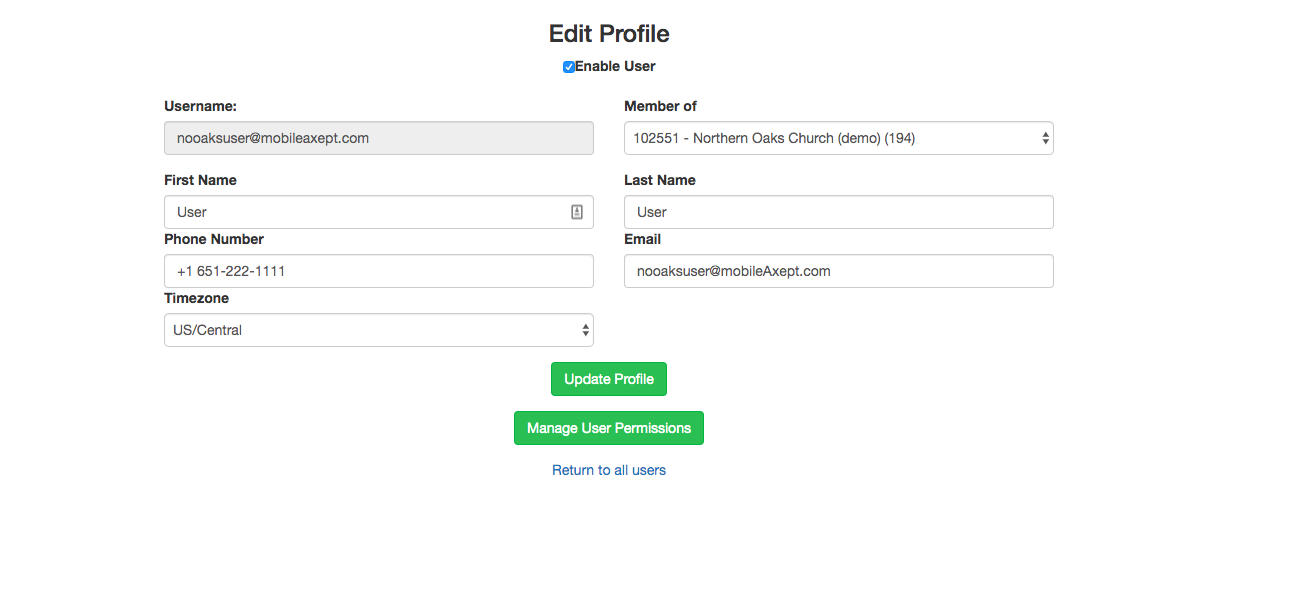
Selecting Edit User will display a form similar to the Add User form showing the user’s current demographic information. This information may be updated and submitted as necessary. Note: Make certain that the Enabled box is checked to make the account active. If the box is not checked the user will not be able to log in.
Managing User Permissions
Click the Manage User Permissions button on the users profile.
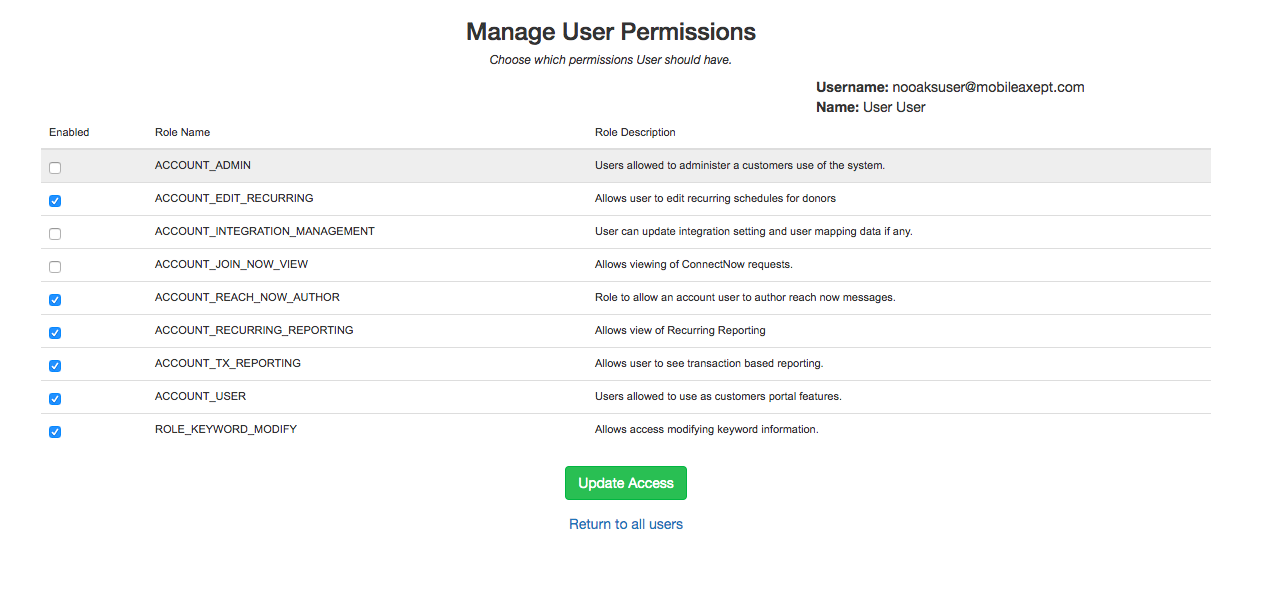
This screen shows the username and name of the user you are managing. The select box shows the list of permission options.
Please note that the list of groups/roles may be different, based on the products to which you are subscribed.
You may select multiple groups by holding Control (Command on a Mac) and clicking the appropriate permissions. Clicking the Update Access button will commit your changes. The updated permissions will take effect the next time the user logs in to the system.
If the user is currently logged in, they will need to log out and then back in. Administrative users can grant permission for user roles to be changed or updated. mobileAxept will only edit user roles when directed to do so by an administrative user.